The unique structure and alignment of your thumb makes it exceptionally mobile but vulnerable to injury, particularly when playing ball sports. Strapping the thumb can help prevent injuries from occurring and provide pain relief. When you first experience thumb pain, the best way to find relief is discover what is causing it.
Three Common Causes of Thumb Pain
The three most common causes of thumb pain include:
- Overuse or RSI. Activities like texting, gaming, typing and using rotating tools in construction can wear down the cartilage, tendons and tissue in and around your thumb joint and cause inflammation, swelling and pain.
- Inflammation. Arthritis, tendonitis, and cellulitis are three of the most common inflammatory conditions that cause thumb pain.
- Injuries. When you fall or hit your thumb you can overstretch or ‘bend’ your thumb backwards into a painful strain.
If you are unsure of what is causing your thumb pain, consult a qualified physician for an accurate diagnosis and proper treatment.
1. Kinesiology taping for thumb tendinitis.
b. Apply the tip of one half on your thumb nail.
c. Gently stretch the strip back in a straight line and secure it at your wrist.
d. Gently lower your wrist joint and lightly press the tape to your skin. Raise it back to the original angle.
e. Apply the end of the second half on top of the first one but a little further in front, so it hangs over your thumb nail.
f. Secure it over the fingertip.
g. Gently stretch the strip and secure it a little further towards your elbow than the first strip.
h. Repeat step (d).
i. Cut another single length of kinesiology tape in half short ways with rounded corners.
j. Holding the ends of one strip with both hands, stretch out the middle.
k. Apply the middle across the base of your thumb joint and gently secure the ends down each side of your hand.
l. Repeat step (j) with the second short strip.
m. Apply the second strip on top of the first strip but, about an inch further towards your elbow.
2. Thumb strapping with Rigid Strapping Tape
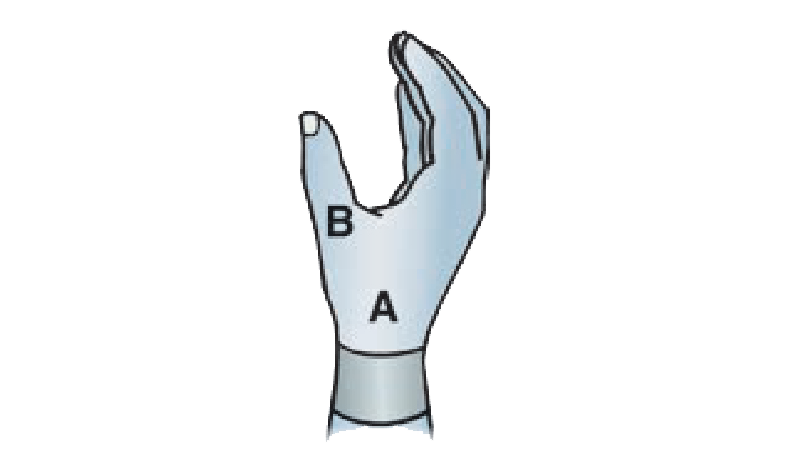
a. Apply a 38mm Elastoplast Rigid Strapping Tape around the wrist, this will act as an anchor for the following taping applications b to f.
b. Apply 25mm Elastoplast Rigid Strapping tape from the middle joint of the thumb down to the anchor to provide support and counteract extension movement that can cause injury
c. Repeat twice, or three times for larger thumbs
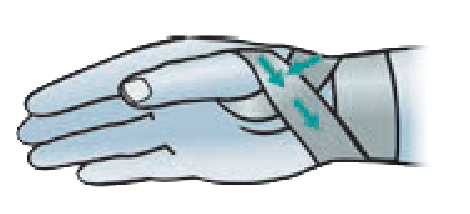
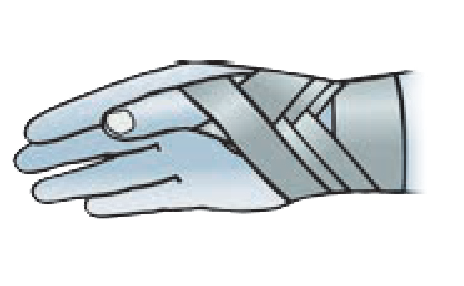
d. Apply 25mm Elastoplast Elastic Adhesive Bandage in a figure 8 formation from the Anchor on the wrist, up to and around the mid-point of the thumb with further pressure applied when coming back to the back of the wrist.
e. Repeat twice, or three times for larger thumbs
f. Finish technique by securing an anchor around the wrist
3. Thumb splint.
a. The tendency to move your injured thumb when using the rest of your hand can be painful. A splint helps to keep your thumb rigid so it can heal.
b. You need to:
1. Find a piece of inflexible material (paddle pop stick, cardboard etc) that is about an inch longer than your thumb.
2. Position it on the back of your thumb, making sure it extends one centimetre above your thumb.
3. Secure the splint with a strapping tape like Elastoplast Rigid Strapping Tape.
For further information regarding Elastoplast products, please contact us via email on anz.consumerservices@beiersdorf.com. Carefully read the instructions for use given in our products’ packages.


